Super Easy Peasy Jam Swiss Roll

The all encompassing basic Swiss Roll can never disappoint you! The perfect base for trifles or a simple after Sunday lunch pudding with lashes of soya custard! Can be filled with whatever filling your heart desires, we have plumped for some delicious strawberry jam! Just remember to line your tin with some greaseproof paper, as if you don't you wont be able to get the sponge out!
 Enjoy!


Ingredients
-2 eggs-
-100g caster sugar-
-100g self raising flour-
-filling of choice-

and that's it!

Method:

1) Measure out ingredients and preheat oven to 180°C.

2)Using an electric whisk (unless you have guns of steel!) Whisk the eggs and sugar together until when lifting the whisk out, the mixture ribbons along the surface (like a snail trail) and holds its shape for about 5 seconds.


 3) Sieve the flour and fold into the mixture slowly, as to not disturb the air in the batter. Fold until well distributed.


4) Pour the mixture into a lined (so so important) tin and bake for about 8 minutes until cooked through.


5) Once out of the oven, leave the cake to cool slightly, and then, with the liner still on roll up the sponge into your swiss roll shape and leave to cool in this shape.


6) When completely cooled, roll back out, fill with your chosen filling (leaving a small border). This time, roll back up and gently peel the liner off the sponge whilst you go!


And Here is the finished result!
 We hope you love this super easy swiss roll as much as we do!


Happy Baking!

xoxox

Tempting Sweet Scones

These tempting scones have been made with almond milk instead of normal milk, but this can be swapped for any other thicker dairy alternative (soya, coconut). Amazing with strawberry jam and whipped soya cream!
Hope you enjoy!
Ingredients:
-225g self raising flour-
-50g dairy free margarine-
-25g caster sugar-
-2 medium eggs-
-150ml dairy free alternative milk (best to use; almond, coconut or soya)-
Method:
1) Preheat the oven to 180°C.
2) Measure out all of your ingredients.
2) Mix together the flour and margarine using your clean fingertips until the mixture resembles fine breadcrumbs.


3) Mix in the sugar until well combined with the breadcrumb mixture.
4) Mix together the egg and the milk until combined together.

5) Add the wet mixture into the dry mixture slowly until the dough combines and is soft and not sticky, if it becomes sticky add a touch more flour to the mix.

6) Roll out the dough until it is roughly about 2cm thick. Use a round cookie cutter or a knife to create round scones.

7) Brush the scones with an egg wash (the other egg and a drop of milk or water) and then sprinkle with sugar.
8) Place in the oven for 10 minutes or until golden brown and when broken apart is flakey.

We hope you enjoy these scrummy scones as part of an afternoon tea or hunger sating snack!

Happy Baking!
xoxox


Chocolate Chip and Cherry Cookies!

These scrumptious cookies are so quick and easy to make and cook, all measurements are in cups so extra easy to make in a hurry or at Uni! This recipe will make about 10 thick cookies or 14 thinner cookies.
Enjoy!
Ingredients:
-3/4 mug or 1 cup of light brown caster sugar or normal caster sugar-
-3/4 mug or 1 cup of dairy free margarine-
-1 medium egg-
-2 capfuls of vanilla extract-
-1 mug or 1 and 1/4 cup of plain flour-
-half tub of glace cherries chopped-
-100g of dairy free chocolate chips or 2 small dairy free chocolate bars chopped-
Method:
1) Preheat the oven to 200°C.
2) Measure out all the ingredients using a mug or a cup.
3) Mix together the sugar and the butter until combined, and then add in the egg and mix.

4)Add in the vanilla extract and start sieving the flour into the mixture slowly, stirring throughout.

5)When all combined, add in the chocolate and the cherries and mix until evenly spread throughout.
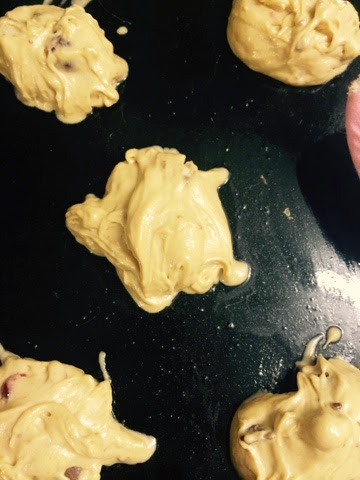
6)Using either an ice cream scoop or your hands, scoop an even amount onto a pre greased or grease proof paper lined baking tray. Make sure these are evenly placed on the tray and with a good distance apart from each other.

7)Place in the oven for 10-15 minutes (depending on how soft you want the cookies), then place onto a cooling rack to stiffen up.
When cooled or still slightly warm tuck into these delicious cookies which make a great snack or after dinner pudding!

Happy Baking!
xoxox


Halloween Icing Figurines!

Trick or Treat?!

Our Halloween cupcakes blog is up (the cupcakes are to DIE for mwahahaha...) and to top the cupcakes we made some little icing Halloween figurines!
To make the figurines all you need is some royal icing (or modelling icing), some food colouring, cocktail sticks, paintbrushes and some eerie imagination!

Below we have included pictures of all the monsterous icing figurines we made to sit on top of our Halloween cupcakes and some picture instructions on how to make the quickest and easiest pumpkin ever!

Have a freakishly happy Halloween everybody!

xoxox


How to make the pumpkin:
Roll some orange food dye into the icing and keep rolling into a semi flat ball until there is no creases and is super soft to the touch.


             Take a cocktail stick and press indents into the sides of the pumpkin ball, working
                                                     slowly and to the top of the pumpkin.


                        Use some black or brown food colouring in a tiny bit of icing, roll into a little
                                                           sausage and attach to the top.

                            For the leaves, add some green food colouring to some icing, mould into
                                         a leaf shape and use a cocktail stick to create the lines!


And there you go!
Happy Halloween!
xoxox


Chocolate Orange Marbled Halloween Cupcakes!

  Get ready for a shock as these delicious monstrosities have a spooky surprise in store!


you will need:
For the monsterific cakes
- 150g caster sugar-
- 150g soft dairy substitute margarine-
- 2 eggs-
- 150g self raising flour-
- 1 grated rind of an orange-
- 10 ml of orange flavouring-
- orange food colouring (or yellow and red)-
- 1 tsp. baking powder-
 -10g cocoa powder-

For the spooooooky icing
-50g soft dairy free margarine-
-200-300g icing sugar (depending on consistency)-
-juice of half an orange-
-orange flavouring-
-orange food colouring (or yellow and red)-
For the monsterific cakes:
1) Preheat the oven to 180°c and set out a cupcake tray with twelve cupcake cases.


2) Cream the margarine and sugar together in a bowl until light and fully combined, then whisk in the eggs one at a time (doesn't matter if the mixture separates just keep mixing and it will come together).
3) Next, add the grated orange rind and flavouring.


4) Gently fold in the flour and baking powder, then separate the mixture into two even bowls. in one bowl, add 10g of cocoa powder and gently fold in. In the other, add 5 drops of orange food colouring and mix until bright orange.


5)Finally, add a spoon full of each mixture into each cupcake case. once this is done, use a toothpick to swirl the mixtures slightly to create a marbled effect. bake in the oven for 15 minutes or until light and fluffy and clean when poked with a skewer.


For the spooooooky icing
1)Cream the icing sugar and margarine together until combined.
2)Add in the orange juice and orange flavouring until it is orangey enough for you!

3)Then add the orange food colouring until spooky and bright orange!
4)Pipe (or spread) the icing on top of the cooled cupcakes, add your spooky decorations and enjoy!

We hope your Halloween is extra spooky!
xoxox


The best dairy free cheeses we've found so far

Anyone who has come off dairy-- or anyone looking at decreasing the amount of dairy in their diet-- knows that it is a pretty daunting move, leaving behind a large number of the foods we eat everyday. I (Heather) removed dairy from my diet because it was making me really ill. The lady who tested me was really helpful, and gave me so many ideas as to what to eat as a dairy replacement. To be perfectly honest, the hardest challenge of living without dairy has been living without cheese. I used to chuck cheese onto everything; mashed potato, shepherd's pie, cheese on toast, cheesey chips (after one too many drinks!). I have had to re-adjust my entire way of eating (especially when dining out) to accompany this big change. So I am going to share with you some of my new experiences with the dairy-free cheese world: what I have enjoyed, and what I have not found to my own tastes. 

Buffalo mozzarella has been a lifesaver. It tastes exactly like normal mozzarella, looks exactly like normal mozzarella, and melts into pizzas divinely. I use this cheese for salads, pizzas, and for melting onto everything! This is probably the most accessable cheese of them all when eating out, depending on the restauraunt (Zizzi's is a personal favourite as I can actually go out and eat a pizza). In the UK, you can generally buy it in most big supermarkets. If you have come off dairy because it makes you ill, just watch your intakes as sometimes it can make me feel slightly queezy (don't go eating a big ball all in one sitting like I have done in the past!...).

Sheep's cheese- where can I start with this beauty?! This is the first cheese I loved after the big switch, and I haven't looked back. It doubles as my normal cheese substitute in every way, from grating it into my mashed potato to slathering all over chips. It is strong enough to hold its' own as a cheddar replacement, and has the same texture. There is a slight aftertaste if you eat enough of it, and when it melts down it becomes slightly stronger. I have only ever found this in Sainsbury's and it comes in teeny tiny slabs which are quite expensive, but for a return to authentic flavour I find it very worthwhile. 

Manchego cheese is really very nice, I use it more as a parmesan replacement, as it has that hard, dark quality to it. I have found it in most supermarkets: if you want to try it out, it features in quite a few Marks and Spencer products.

Proper Greek Feta cheese. I love it, it is so strong and so crumbly  that it doesnt take much to satisfy any cheesy craving! It's the ultimate salad cheese; I will admit I have gone through a block once just as my dinner alone! Put it with sundried tomatoes for the ultimate taste heaven. You have to watch when buying feta that the manufacturers haven't snuck any cheeky cow into the mix. This makes it slightly more expensive but it's so so worth it. I have seen the good stuff in most shops. 

Cheese spread isn't exactly cheese but I was an addict and a half before it got taken out and I actually squealed when I went to the Tesco FreeFrom aisle and saw all different flavours of cheese spread waiting there for me. Sure it's no Dairylea, but it's a nice Soya based alternative, which is great for vegans as well as dairy free kiddos. It doesn't look the most appealing (nice tinge of grey) but it tastes nice and fills that cheesy void I've had since April. 

Soya cheese. This is probably the cheese I have touched the least. I have brought it and tried it and it is different. It's pretty rubbery and very very mild in the mouth but is workable. Probably a good cheese for little kids that aren't eating cheese to get some protein in (although I'd advise against a soya overload!). I have brought this from Tesco before.

Halloumi cheese --when you can actually find it without the added cow-- is yummy, melted goodness. Absolutely lovely on a burger or with chicken, it can be found everywhere, but you have to watch the milk content from brand to brand. 

Now for the cheese that I just cannot get my taste buds around... goats cheese. So so many people love it, and I'm not knocking that-- you too may absolutely adore it-- but to me, it smells and tastes like eating a farm and I just cannot abide this. My baby brother adores it but it is just not for me. If you love super strong cheese you will most likely love this too! You can get this from all shops and quite alot of local conveniance shops too. 

I hope this rundown of the best dairy-free cheese so far has been useful in some way, to give you some initial ideas on cheese alternatives and what to buy when first making the cheesy transition!
 xoxox


Yummy Rustic Homemade Pizza

Eating without dairy doesn't mean that we have to exclude all the yummy things in life, such as our personal favourite: pizza! This pizza is made entirely from scratch, using all cheap ingredients that are really easy to find! The pizza base might take a while to prepare (has to double in size like bread doesn't it?) but you can freeze the base which will speed things up for the future. On the plus side, the sauce takes a mere 5 minutes to make, and doesn't involve scales (which makes for excellent Uni grub!)
 Hope you all enjoy!


Ingredients:
For the base:
2 1/2 average mug size scoops of flour (strong or normal, we have used strong wholemeal)
-1 sachet of quick dry yeast-
-250ml of warm (not hot!) water-
-4 capfuls of virgin or sunflower oil-
-2 pinches of salt-

For the sauce:
-Half a tin of plum tomatoes-
-Half a chopped onion-
-4 chopped sundried tomatoes or tomato puree-
-Splash of tomato ketchup-
-2 chopped cloves of garlic-
For the topping:
We enjoyed our pizza with buffalo mozzarella and salami, but you can go for anything you want!
Method:
Pre-heat the oven to 200°C
For the base:
1) Measure out all ingredients and into a bowl add the flour, yeast and salt.


2)  Make a little well in the middle of the flour, and then add the oil and slowly pour in the warm water.  Roll this mixture into whole ball of dough, at this point it doesn't matter if it is a little bit wet as the rolling flour will absorb this.


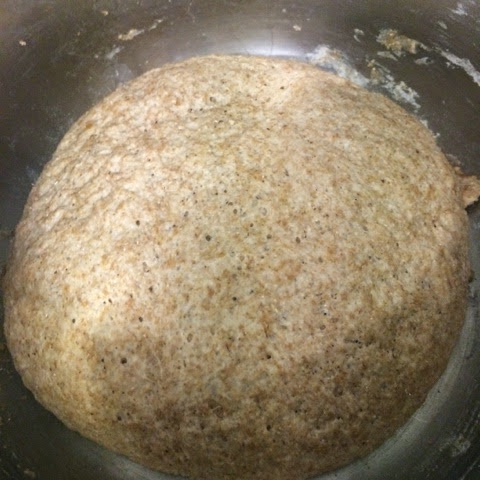
3) Spread a little of the flour onto a surface and knead the dough for about 5 minutes. Then put back in a bowl and cover with cling film or a damp towel, and place somewhere warm until it doubles in size.
4) Once doubled in size (shouldn't take more than 20-30 minutes) take out of the bowl and knead again for a couple of minutes.

5) Split the dough into portions and then roll out into any shape until about 1/2 cm thick. Pop onto a pizza tray and pre-cook for about 12 minutes to make sure the dough cooks thoroughly when the yummy toppings are added!

For the Sauce:
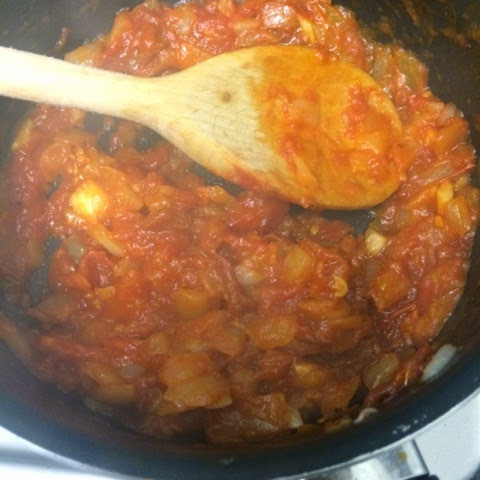
1) In a saucepan fry the chopped Onion and Garlic until soft. Then add the chopped sundried tomatoes (or puree), and then the Plum tomatoes. Add a splash of tomato ketchup and reduce and cook for about 5 minutes.

2) Puree the sauce if you want a smooth sauce or leave chunky for a little bit more texture.


Once the base is partially cooked and quite hard to the touch, add the sauce and then the fun bit- your chosen toppings!
 Pop into the oven for another 10- 15 minutes until the toppings are melted and cooked, and the base is starting to crisp and brown.


Take out of the oven and enjoy!


xoxox