Showing posts with label lactose intolerant. Show all posts

4 Ingredient Apple Crumble!

What is better than on a cold winters night than having some warm apple crumble with some soya custard? For us it's a no brainer! This is a super easy recipe to prepare as it only involves 4 ingredients and a bit of elbow grease! Get ready for some warming vegan friendly apple crumble!


Ingredients:


-3 to 4 Bramley cooking apples-
-100g granulated sugar-
-150g plain flour-
-75g of dairy free margarine-

Method:

1) Preheat the oven to 180°C.

2) Peel, core and chop the apples into small chunks and place in a large pan of water to stop the apples turning brown whilst chopping.


3) Drain the water from the pan, add 60g of the sugar and two tablespoons of water back into the apples and simmer on a medium heat until the apples become soft and mushy. Pour the apples into an oven proof dish.


4) Using your hands, mix the flour, butter and sugar together until the mixture resembles breadcrumbs.

5) Sprinkle the breadcrumb mixture over the apples until the apples are fully covered, you may need to make more mixture if necessary.


6) Bake in the oven for about 30 minutes until the breadcrumbs have turned golden brown and cooked through.

Spoon into a bowl, pour lashings of soya cream or soya custard on top, sit by the fire and enjoy!


Happy Baking!

xoxox

Lemon Drizzle Cupcakes!

I have been fantasising about lemon drizzle cake for weeks now and as there was a friends birthday and other friends stopping for the weekend I thought this was just the perfect time to bake some lemon drizzle cupcakes! In the baking process we put chocolate chips in, and they subsequently sunk to the bottom and out of the actual cake! The recipe we're putting up will be without chocolate chips but if you have a fool proof way to keep the chips from sinking like brick then please go ahead (and let us know how you did it!). If you want to cheat (like we did) then you can just use bottled lemon juice and no zest but they will be even more lemony with zest! The cupcakes are accompanied by a super tart simple icing which is a doddle to make! Don't be alarmed by how moist the cakes are and if they peel off the wrappers messily its a good thing! The recipe makes about 9 larger cupcakes!
Enjoy! 


Ingredients:


For the cake:
-150g dairy free margarine-
-150g caster sugar-
-2 medium eggs-
-zest of 1 lemon-
 -juice of half a lemon or a generous splash of bottled lemon juice-
-150 to 170g self raising flour (depending on how moist you want the cakes)-
-teaspoon of baking powder-
-optional chocolate chips-
For the icing:
-500g icing sugar-
-as much lemon juice to get the consistency of icing that you want-
Method:
1) Preheat the oven to 180°C and measure out your ingredients.
2) Cream the butter and sugar together until lighter and you can't feel the sugar underneath the spoon.
3) Add in the 2 eggs one by one and mix until well combined and not lumpy (this will take longer with cold butter and warm eggs!).

4) Add in your lemon zest and juice and mix together.
5) Sieve in your flour and baking powder and fold together, if you feel the mix is too runny just add a little more flour. Fold in some chocolate chips if you wish.


6) Spoon or use an ice cream scoop to evenly spoon the mixture into cupcake cases. Pop in the oven for 15-18 minutes until golden brown and drawing a clean skewer. Leave to cool in the tin for 5 minutes then cool completely on a wire rack.


7) Mix together the icing sugar and lemon juice until the icing reaches the consistency you desire, then when the cakes are cooled spoon the icing onto the cakes! Don't be afraid to microwave the icing for a couple of seconds to make it runnier and easier to work with!


Now peel off the wrapper and tuck in!


Happy Baking!
xoxox

Halloween Icing Figurines!

Trick or Treat?!

Our Halloween cupcakes blog is up (the cupcakes are to DIE for mwahahaha...) and to top the cupcakes we made some little icing Halloween figurines!
To make the figurines all you need is some royal icing (or modelling icing), some food colouring, cocktail sticks, paintbrushes and some eerie imagination!

Below we have included pictures of all the monsterous icing figurines we made to sit on top of our Halloween cupcakes and some picture instructions on how to make the quickest and easiest pumpkin ever!

Have a freakishly happy Halloween everybody!

xoxox


How to make the pumpkin:
Roll some orange food dye into the icing and keep rolling into a semi flat ball until there is no creases and is super soft to the touch.


             Take a cocktail stick and press indents into the sides of the pumpkin ball, working
                                                     slowly and to the top of the pumpkin.


                        Use some black or brown food colouring in a tiny bit of icing, roll into a little
                                                           sausage and attach to the top.

                            For the leaves, add some green food colouring to some icing, mould into
                                         a leaf shape and use a cocktail stick to create the lines!


And there you go!
Happy Halloween!
xoxox

Chocolate Orange Marbled Halloween Cupcakes!

  Get ready for a shock as these delicious monstrosities have a spooky surprise in store!


you will need:
For the monsterific cakes
- 150g caster sugar-
- 150g soft dairy substitute margarine-
- 2 eggs-
- 150g self raising flour-
- 1 grated rind of an orange-
- 10 ml of orange flavouring-
- orange food colouring (or yellow and red)-
- 1 tsp. baking powder-
 -10g cocoa powder-

For the spooooooky icing
-50g soft dairy free margarine-
-200-300g icing sugar (depending on consistency)-
-juice of half an orange-
-orange flavouring-
-orange food colouring (or yellow and red)-
For the monsterific cakes:
1) Preheat the oven to 180°c and set out a cupcake tray with twelve cupcake cases.


2) Cream the margarine and sugar together in a bowl until light and fully combined, then whisk in the eggs one at a time (doesn't matter if the mixture separates just keep mixing and it will come together).
3) Next, add the grated orange rind and flavouring.


4) Gently fold in the flour and baking powder, then separate the mixture into two even bowls. in one bowl, add 10g of cocoa powder and gently fold in. In the other, add 5 drops of orange food colouring and mix until bright orange.


5)Finally, add a spoon full of each mixture into each cupcake case. once this is done, use a toothpick to swirl the mixtures slightly to create a marbled effect. bake in the oven for 15 minutes or until light and fluffy and clean when poked with a skewer.


For the spooooooky icing
1)Cream the icing sugar and margarine together until combined.
2)Add in the orange juice and orange flavouring until it is orangey enough for you!

3)Then add the orange food colouring until spooky and bright orange!
4)Pipe (or spread) the icing on top of the cooled cupcakes, add your spooky decorations and enjoy!

We hope your Halloween is extra spooky!
xoxox


Yummy Rustic Homemade Pizza

Eating without dairy doesn't mean that we have to exclude all the yummy things in life, such as our personal favourite: pizza! This pizza is made entirely from scratch, using all cheap ingredients that are really easy to find! The pizza base might take a while to prepare (has to double in size like bread doesn't it?) but you can freeze the base which will speed things up for the future. On the plus side, the sauce takes a mere 5 minutes to make, and doesn't involve scales (which makes for excellent Uni grub!)
 Hope you all enjoy!


Ingredients:
For the base:
2 1/2 average mug size scoops of flour (strong or normal, we have used strong wholemeal)
-1 sachet of quick dry yeast-
-250ml of warm (not hot!) water-
-4 capfuls of virgin or sunflower oil-
-2 pinches of salt-

For the sauce:
-Half a tin of plum tomatoes-
-Half a chopped onion-
-4 chopped sundried tomatoes or tomato puree-
-Splash of tomato ketchup-
-2 chopped cloves of garlic-
For the topping:
We enjoyed our pizza with buffalo mozzarella and salami, but you can go for anything you want!
Method:
Pre-heat the oven to 200°C
For the base:
1) Measure out all ingredients and into a bowl add the flour, yeast and salt.


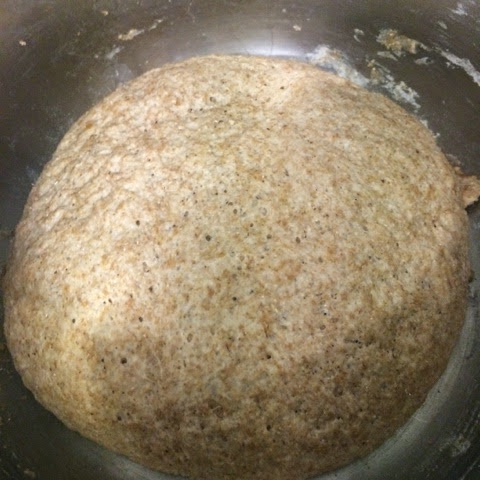
2)  Make a little well in the middle of the flour, and then add the oil and slowly pour in the warm water.  Roll this mixture into whole ball of dough, at this point it doesn't matter if it is a little bit wet as the rolling flour will absorb this.


3) Spread a little of the flour onto a surface and knead the dough for about 5 minutes. Then put back in a bowl and cover with cling film or a damp towel, and place somewhere warm until it doubles in size.
4) Once doubled in size (shouldn't take more than 20-30 minutes) take out of the bowl and knead again for a couple of minutes.

5) Split the dough into portions and then roll out into any shape until about 1/2 cm thick. Pop onto a pizza tray and pre-cook for about 12 minutes to make sure the dough cooks thoroughly when the yummy toppings are added!

For the Sauce:
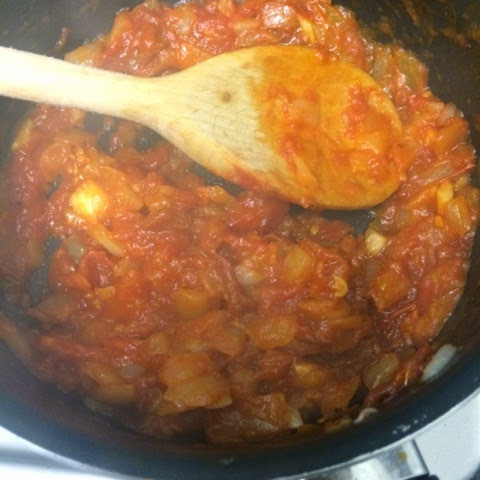
1) In a saucepan fry the chopped Onion and Garlic until soft. Then add the chopped sundried tomatoes (or puree), and then the Plum tomatoes. Add a splash of tomato ketchup and reduce and cook for about 5 minutes.

2) Puree the sauce if you want a smooth sauce or leave chunky for a little bit more texture.


Once the base is partially cooked and quite hard to the touch, add the sauce and then the fun bit- your chosen toppings!
 Pop into the oven for another 10- 15 minutes until the toppings are melted and cooked, and the base is starting to crisp and brown.


Take out of the oven and enjoy!


xoxox

The Best Ever Chocolate Icing

So you have baked your Quick and Easy Chocolate Sponge and now want to ice it! Well guess what? we have the most delicious dairy free chocolate icing waiting for you to slather all over your sponge! This icing is also great for cupcakes, tray bakes, fillings and even as ice cream sauce!
You will need:
-20g of dark chocolate-
-180g icing sugar-
-50g dairy free butter (Vitalite or Pure)-
-20g cocoa powder-

1) Melt the chocolate in a heat-resistant bowl, either over a saucepan of water or in a microwave (blast for 10-20 seconds, then stir to prevent the chocolate from burning) and leave to cool slightly.
2) Beat the butter, the cocoa powder and the icing together in a bowl, being gentle at first so that the sugar does not go everywhere!

3) Once the butter and icing sugar are combined, gently pour in the (slightly cooled) melted chocolate and stir until well combined.
4) Spread on the inside and outside of all of your chocolate baked goodies!


Top tip- put the icing in the fridge to set for a little bit. This makes it thicker and fudgier!

We hope you enjoy this perfect cake icing as much as we loved licking the bowl afterwards!

xoxox